

Version 1/13
-
Next » -
Current version
dfighter, 03/25/2011 12:16 am
Work In Progress, don't touch it yet!
Creating new land ( WIP )
This document will show you how to build a very minimalistic continent using materials that come with Ryzom Core.
Assumptions
1.) You have downloaded and set up the Ryzom asset repository, and mounted it to W:\
2.) You have checked out the RyzomCore source code, and mounted it to R:\
3.) You have mounted R:\code\ryzom\common\data_leveldesign as L:\
4.) You have downloaded the newbieland assets and merged them into the Ryzom asset repository
5.) You have copied the leveldesign tools package's contents to R:\code\ryzom\tools\leveldesign\install
6.) You have processed the Ryzom asset repository, with the Python scripts in R:\code\nel\tools\build_gamedata
I. Create the landscape using the world editor
1. Setup
        a.) Decide what you will call your new land, I called my first one "developerland".
        b.) Create a new subdirectory in R:\code\ryzom\tools\leveldesign\install\continents with the same name as your land, so for me this is "developerland".
        c.) Copy all the contents, except the "pacs" directory and the "newbieland.land" file, from the "newbieland" subdirectory to the directory you've just created.
        d.) Start up the world editor from R:\code\ryzom\tools\leveldesign\install
        e.) Click Project->New Landscape
        f.) Click File->Save
        g.) Navigate to R:\code\ryzom\tools\leveldesign\install\world_editor_continents and type in the name of your land as filename ( in my case again this is "developerland" ), and hit enter
        h.) Navigate to R:\code\ryzom\tools\leveldesign\install\continents\, enter the directory that bears the name of your land, and again type in the name of your land ( in my case "developerland" ), and hit enter.
        i.) Click Project->Settings, and set the directory created in b.) as the data directory
        j.) Set the "context" to "default"
        k.) Click OK and wait until the world editor loads the data found in there.
        l.) Save the project again
2.) "Painting"
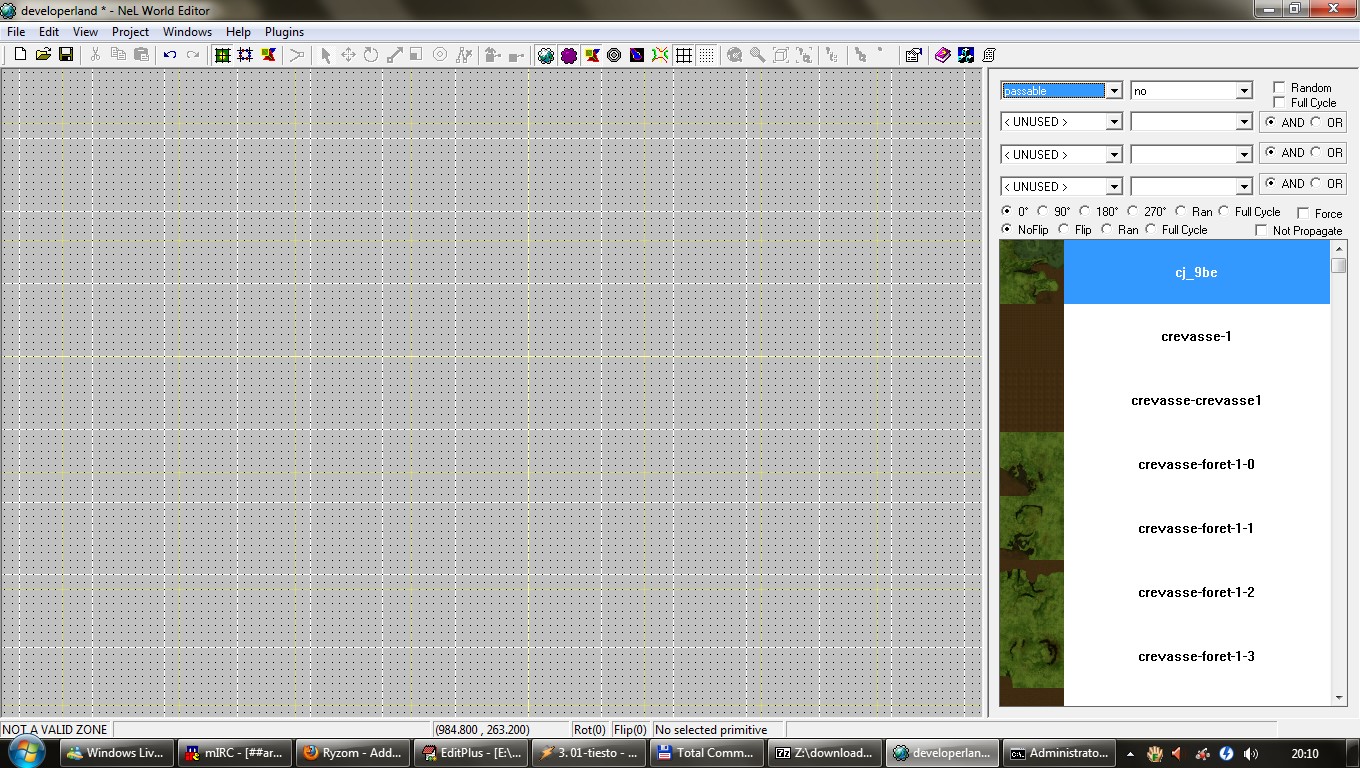
a.) Click View->Zone
b.) Select "passable" and "no" as the first filter category, this will show you all available LIGO bricks (in the newbieland set, since it has no passable bricks ).
c.) Click Edit->Goto Position, set 0,0 and hit Goto. This will set the screen's center as 0,0 1_AA, lay a "crevasse_1" brick there to mark it.
d.) Bring that brick to the upper left corner using the middle mouse button. This will make your screen show only valid areas.
e.) Paint your land using the bricks mentioned before!
f.) Save the project3.) Finally
a.) Copy your .land file from R:\code\ryzom\tools\leveldesign\install\continents\ to W:\Database\Landscape\ligo\jungle\
b.) Click File->Export snapshot, then click OK. This will be the ingame map, we will work with this a bit later.II. Create sheets using Georges editor
1.) Setup
a.) Go to L:\leveldesign\World
b.) Create a new subdirectory, with the same name as your land ( "developerland" in my case ).
c.) Copy the files from L:\leveldesign\World\newbieland to this new subdirectory
d.) Rename newbieland.continent to <yourland>.continent where <yourland> is the name of your land ( "developerland" in my case ).
e.) Open up continent.cfg with an editor
f.) Change the "LandFile" setting to the .land file's path you copied in 3.a
2.) Edit the Ryzom world sheets
a.) Open L:\leveldesign\World\Ryzom.world with Georges
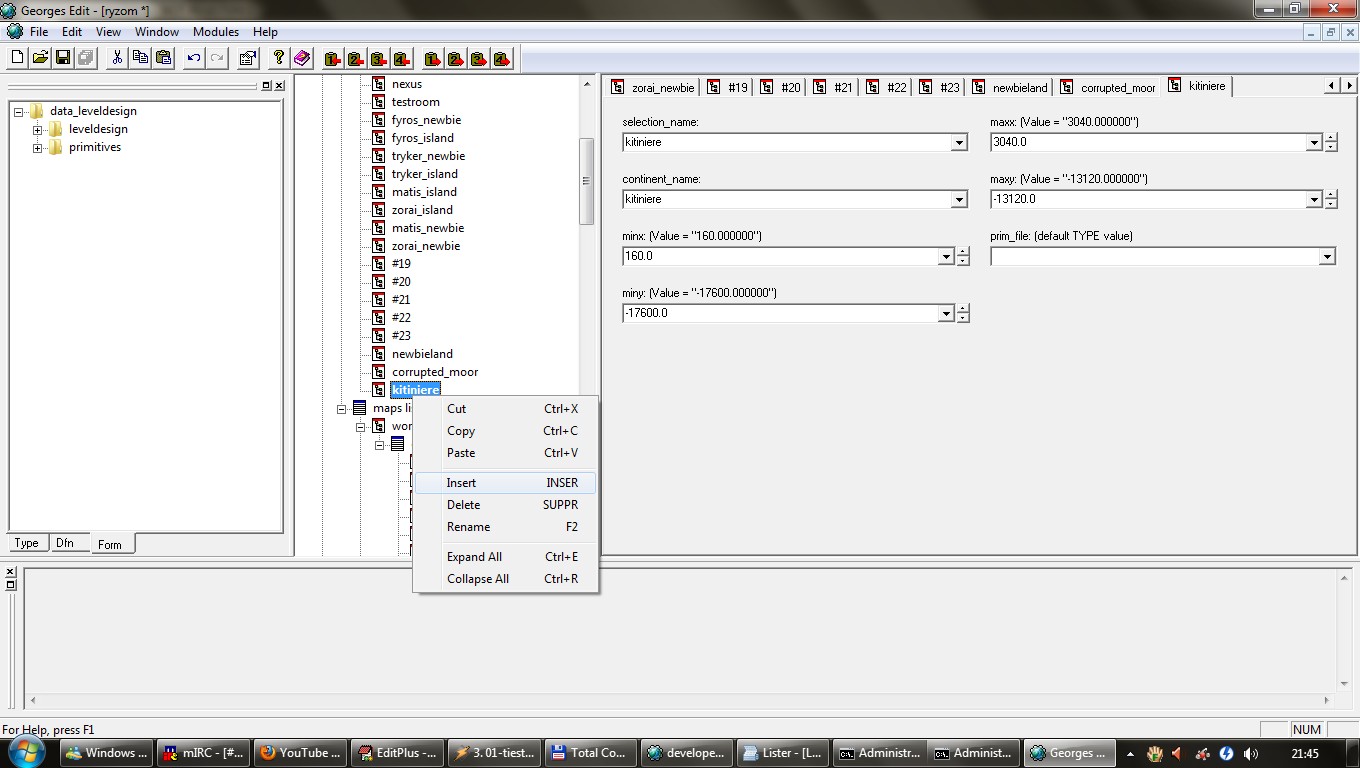
b.) Right click on the last entry in the "continents list" and click "insert".
c.) Rename the created new entry to the name of your land ( "developerland" in my case )
d.) Switch back to the world editor window
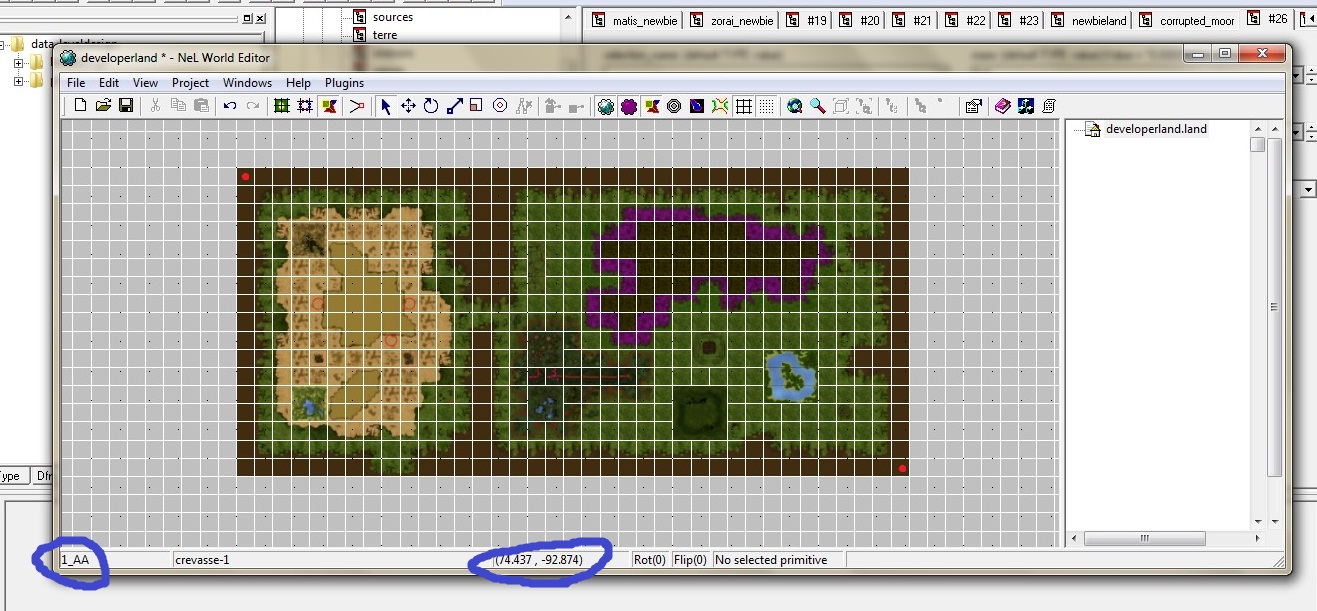
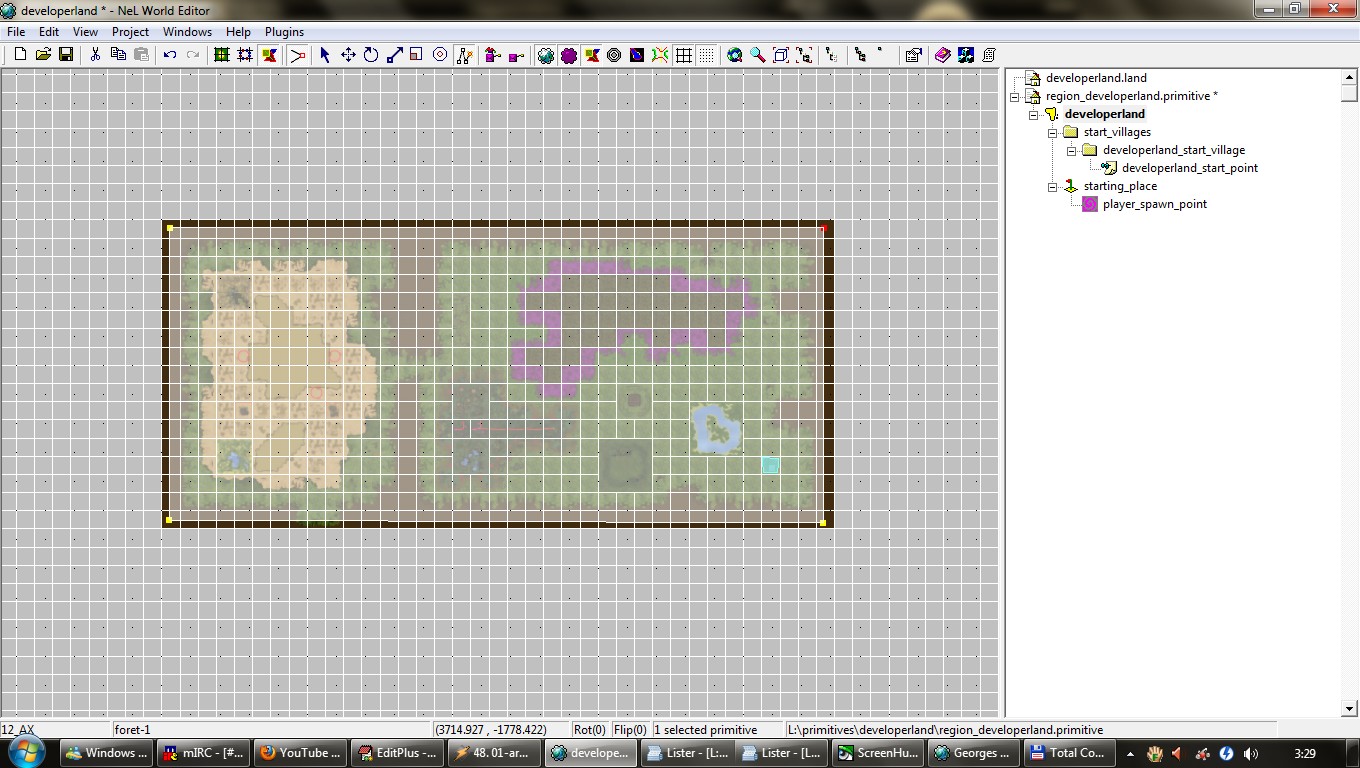
e.) Move your mouse pointer first to the upper right and then the lower left corners of your land ( red dots on the picture ).
f.) Write down the data highlighted on the picture with blue outline. One of them is a zone identifier ( 1_AA ), the other is the x,y coordinate pair ( 0,0 ).
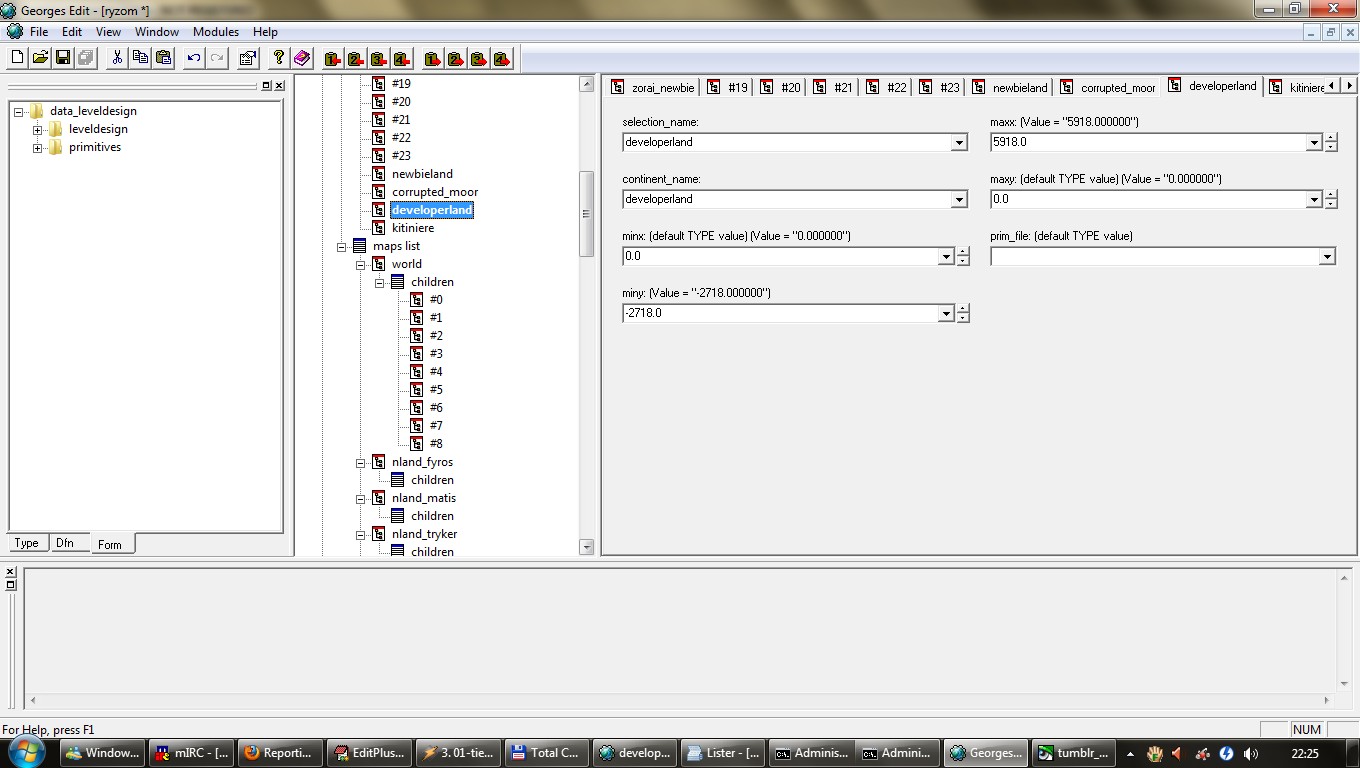
g.) Go back to the Georges editor with your land's sheet open.
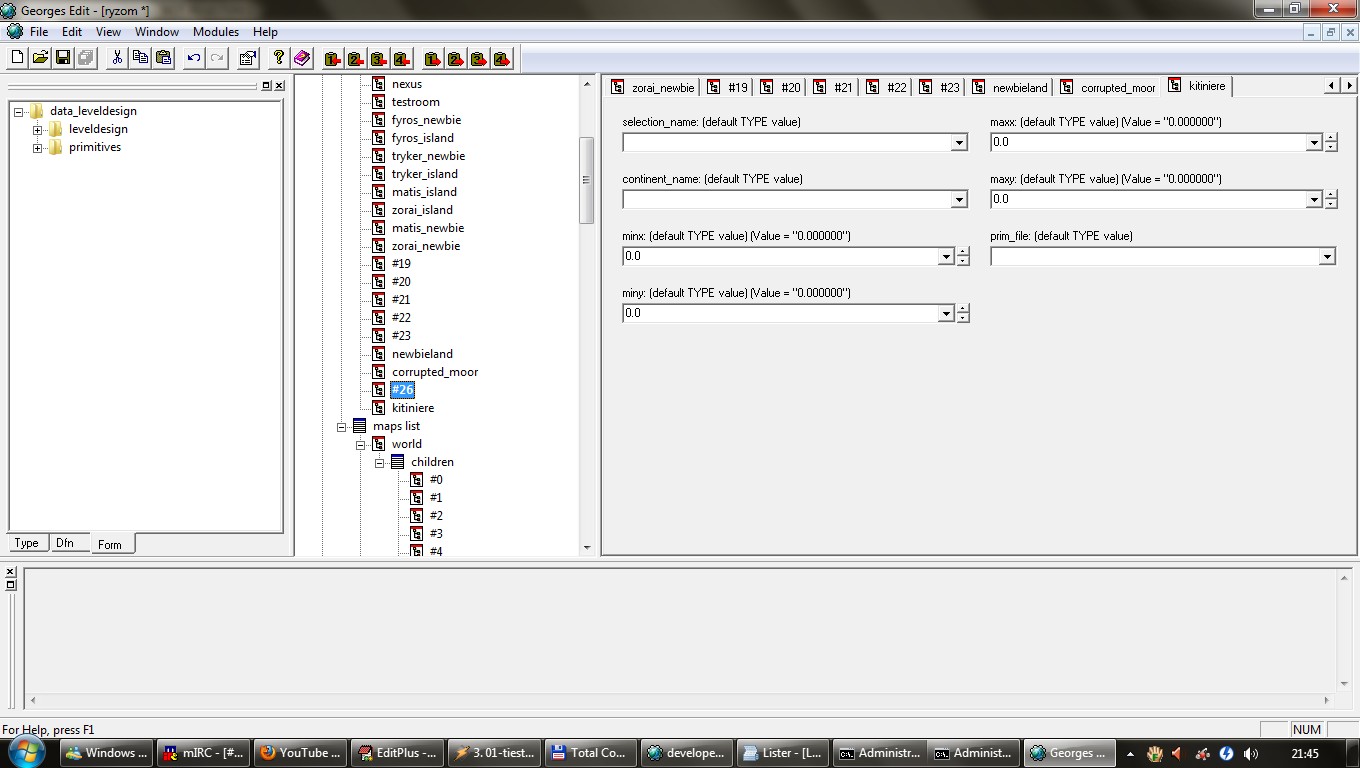
h.) Fill in the "selection name" and "continent name" fields with the name of your land ( "developerland" in my case ).
i.) Fill in the minx,maxx,miny,maxy fields using the data you wrote down in f.)
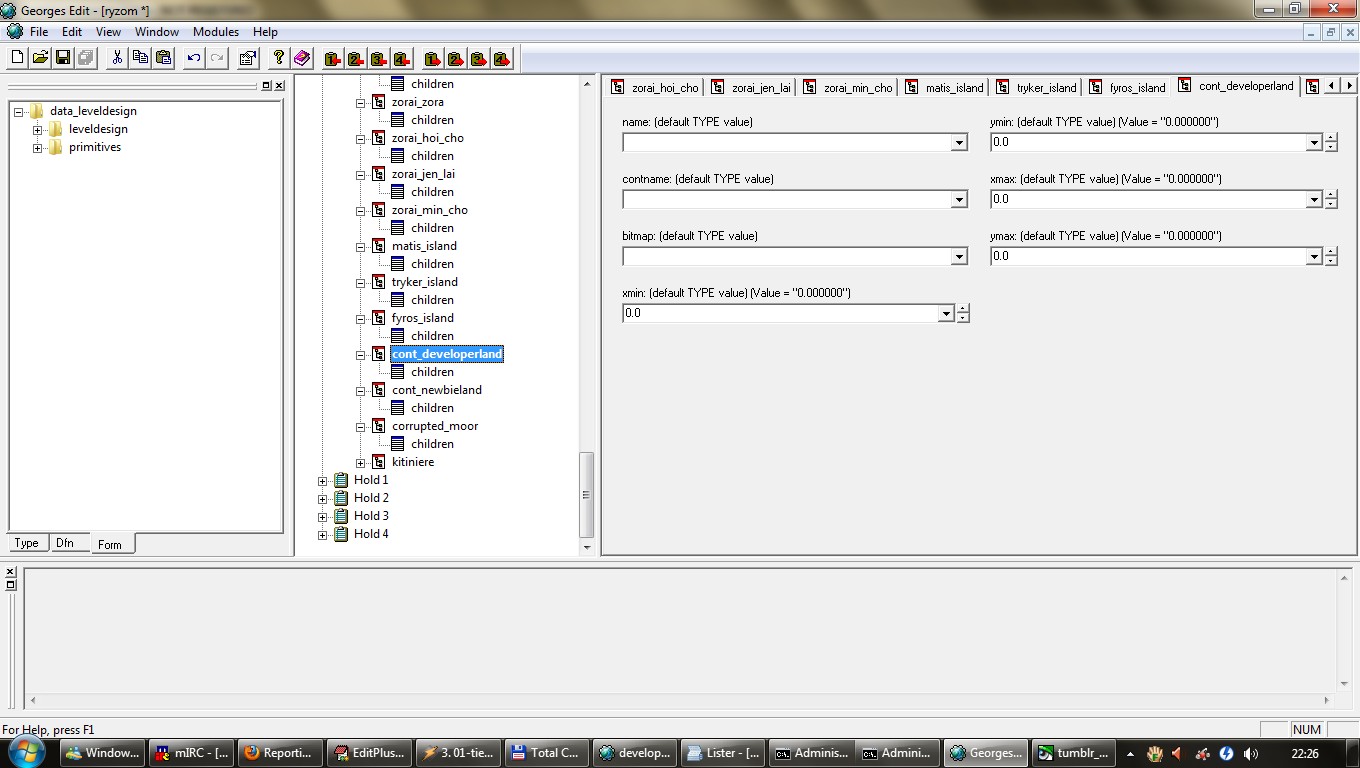
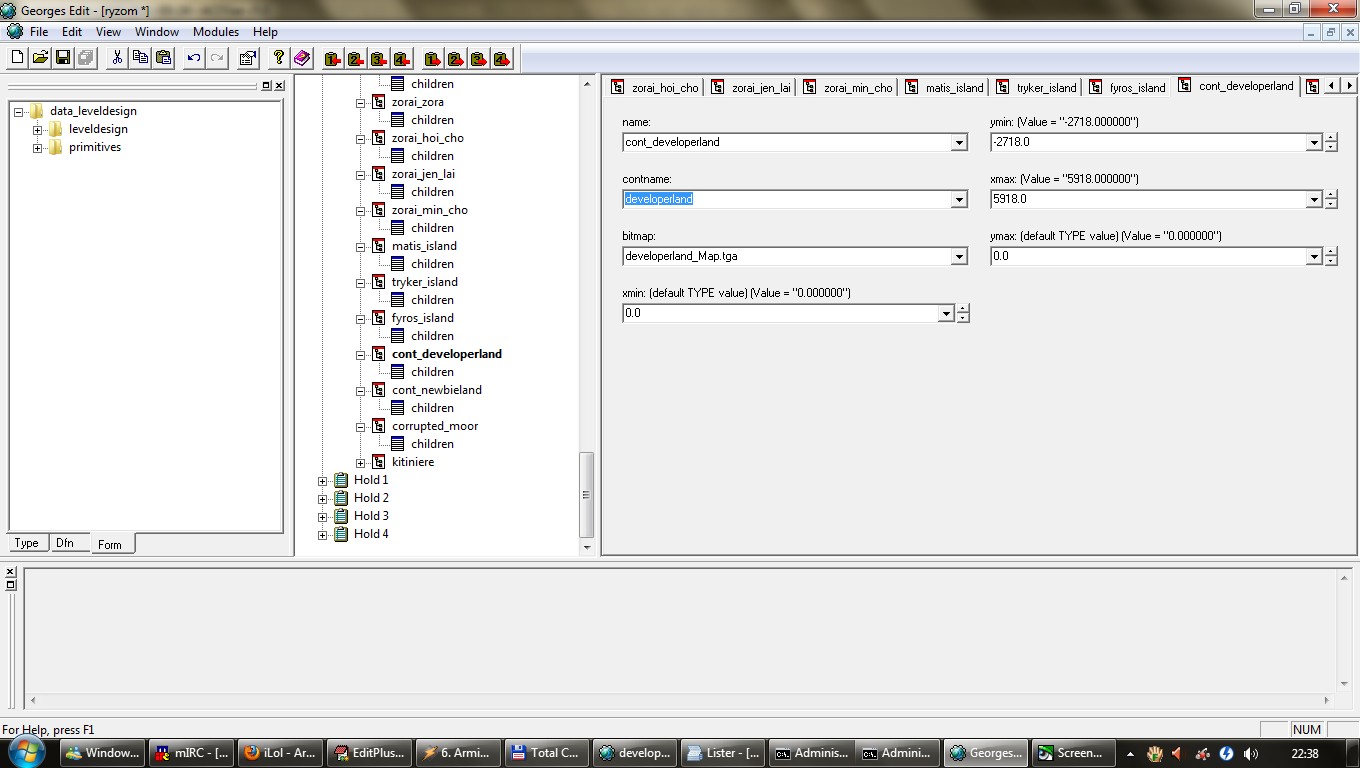
j.) Find the "maps list" section, and add a new entry using the same procedure as before ( click and insert ).
k.) Rename the new sheet to your land's name but with a "cont_" prefix. ( "cont_developerland" in my case )
l.) Fill in the same minx,maxx, etc data you filled into the previous sheet.
m.) Fill in the name of the sheet into the "name" field, fill in the name of your land into the "contname" field.
n.) Fill in the "bitmap" field, in the format of "<landname>_Map.tga" where <landname> is the name of your land. ( "developerland" in my case )
o.) Save your work with Georges3.) Edit the land sheets
a.) Go to the subdirectory you created in II.1.b
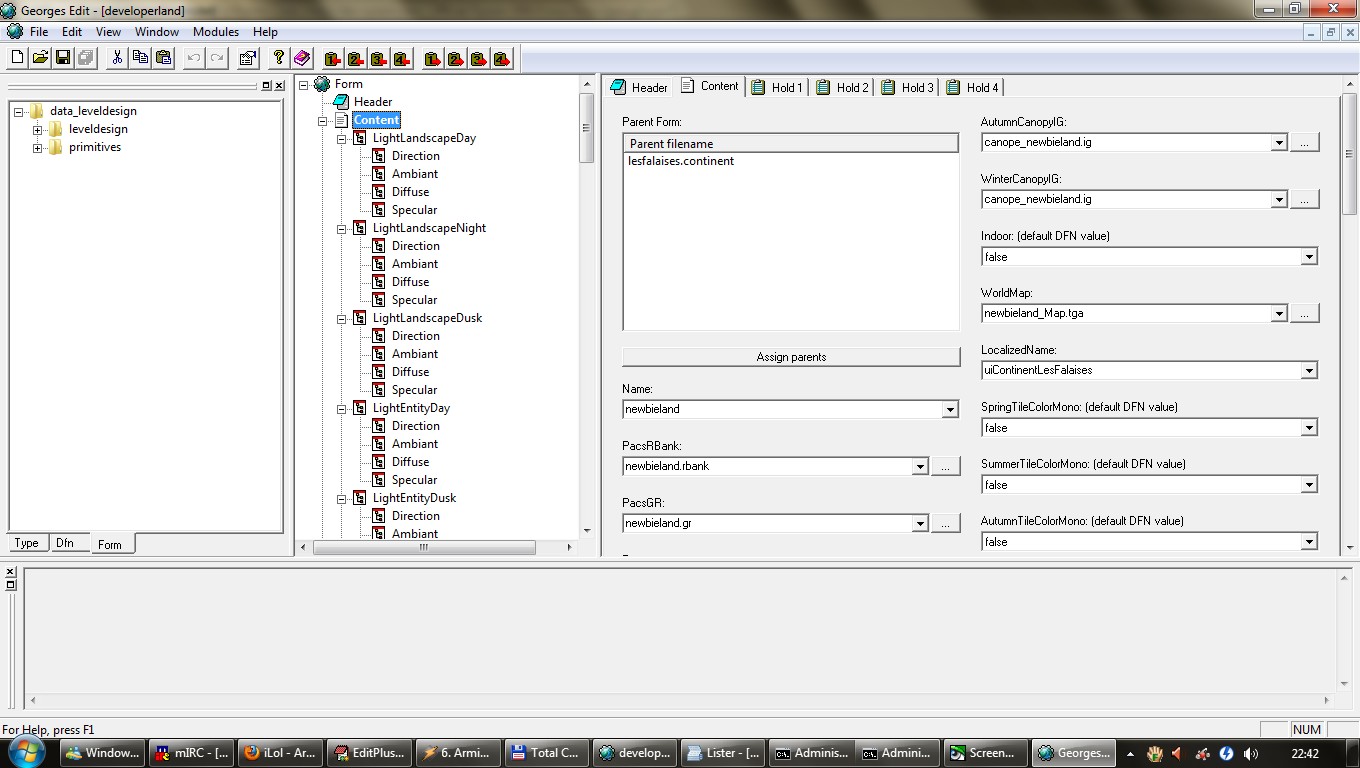
b.) Open the .continent file there with Georges. This file is basically the sheet of Newbieland so we will have to customize it to our needs!
c.) Change the "Name", "PacsRBank", "PacsGR", "LandscapeIG", "WorldMap" fields. Change the word "Newbieland" to your land's name in the.
d.) Change the ZoneMin, and ZoneMax fields to reflect the data you wrote down in II.2.f. ( ZoneMin is 1_AA, ZoneMAx is 17_BK in my case ).
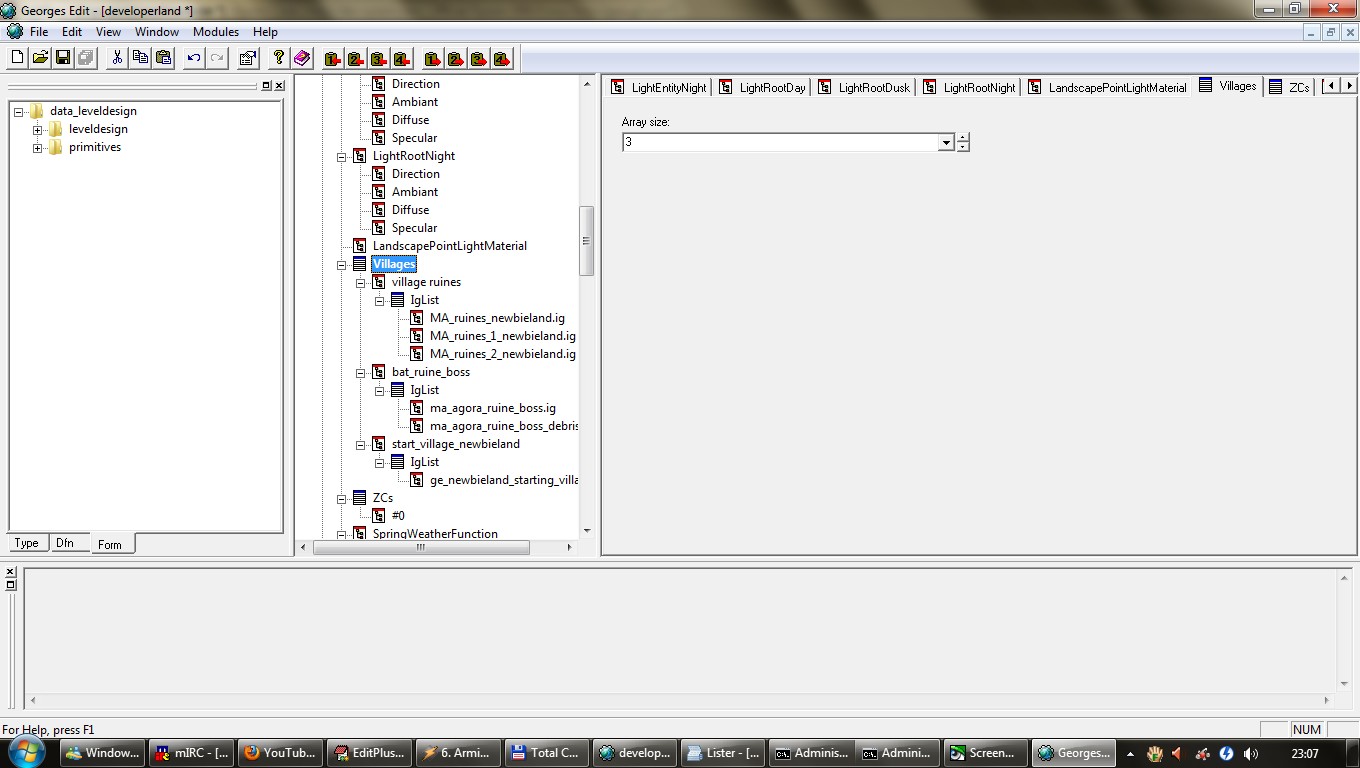
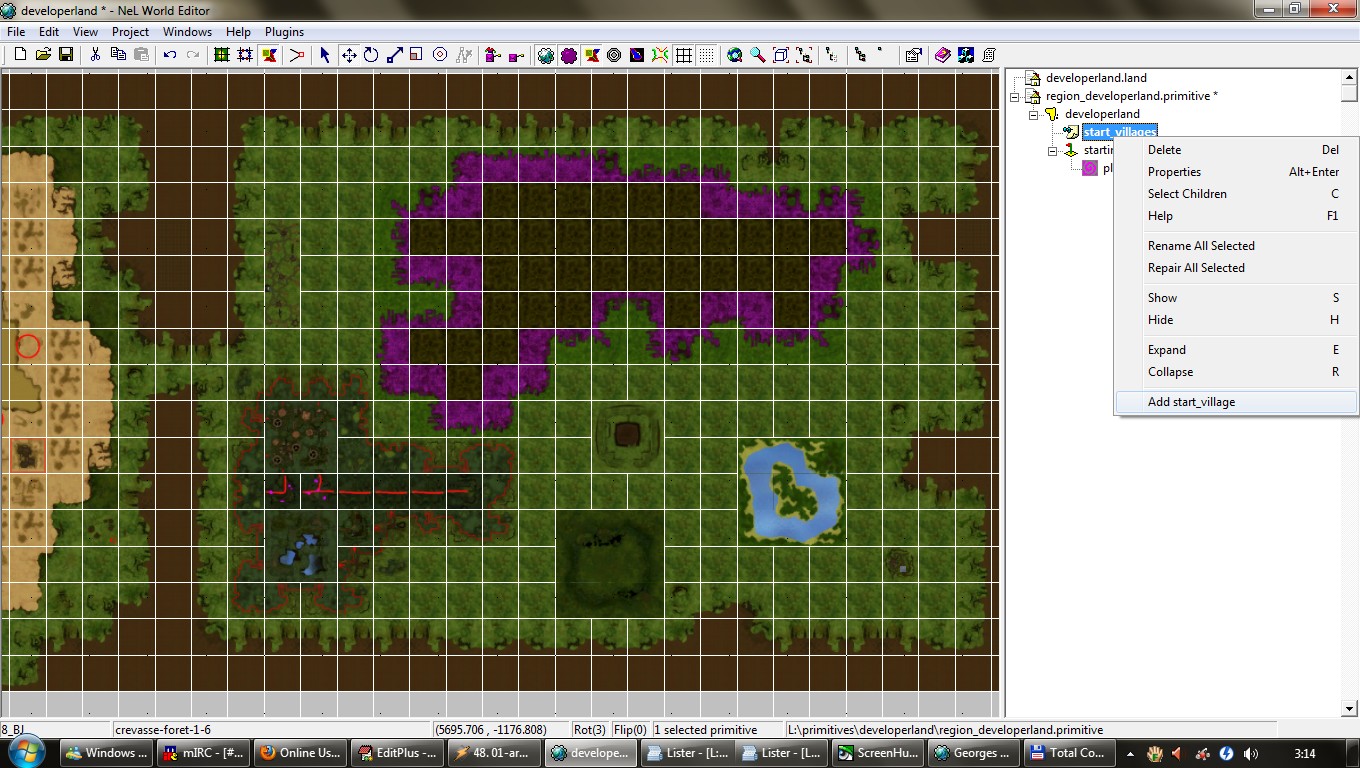
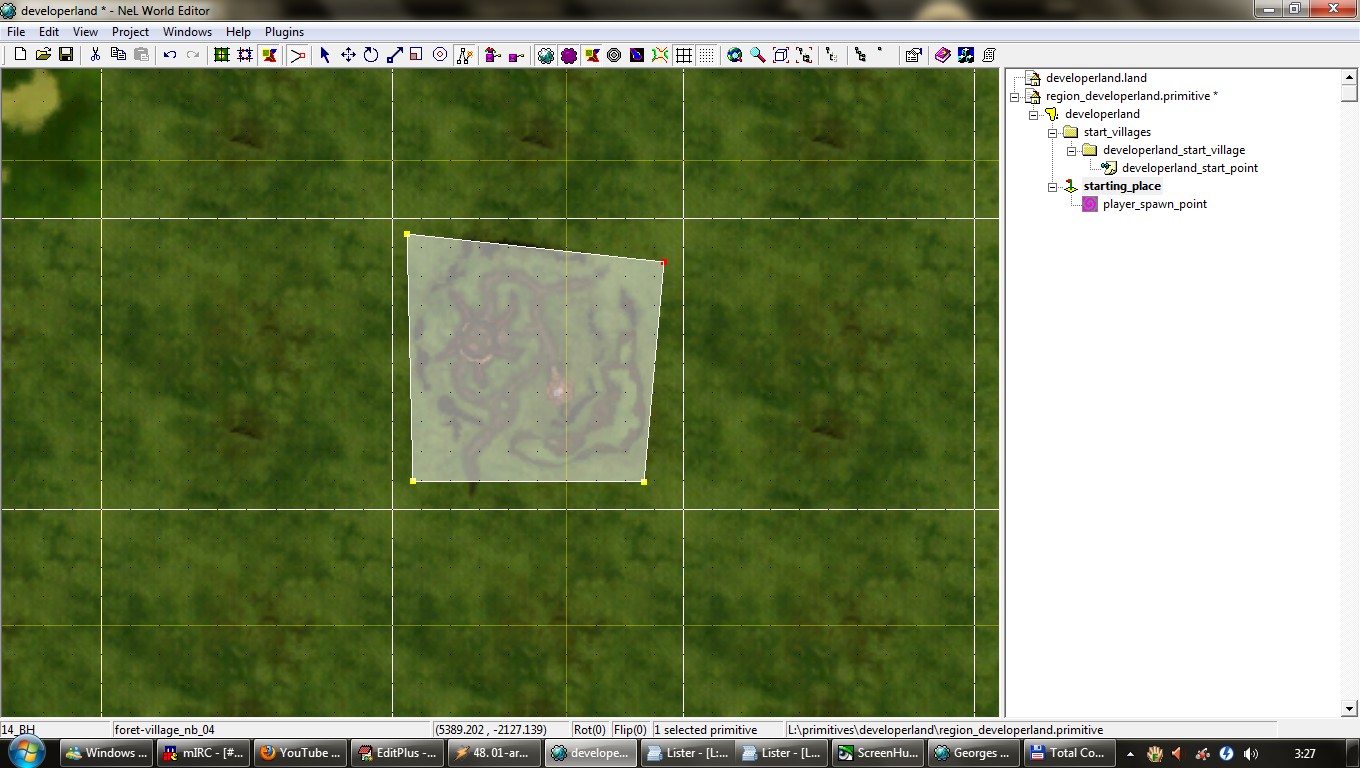
e.) Find the "villages" section in the list and then delete all of them except "start_village_newbieland" one.
f.) Delete the iglist of "start_village_newbieland". ( Remember this is a simplistic land, no buildings and such ). We will return to here later.
g.) Find the "ZCs" section and delete all ZCs.
h.) Find the "Landmarks" section and delete all of them.
i.) Save your changes.III. Creating the region primitives
1.) Setup
a.) go to L:\primitives, and create a sub-directory, with the same name as your land ( "developerland" in my case ).
b.) go back to the world editor
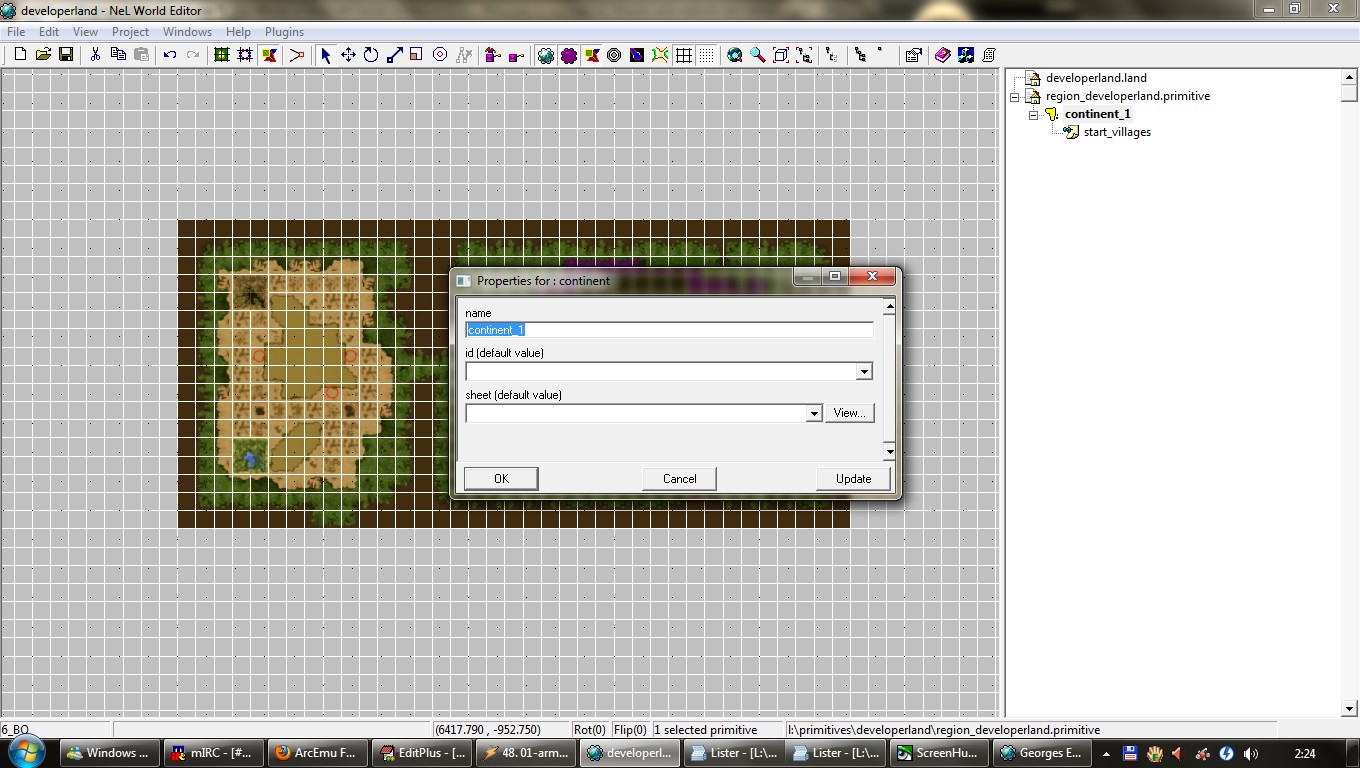
c.) Click project->new primitive
d.) Save the project, when asked navigate to L:\primitives\<nameofyourland>, where <nameofyourland> is the name of your land. ( "developerland" in my case ).
e.) Type in "region_<nameofyourland>", and hit enter.
f.)